 JWW Bridge
Add markup
Click the markup button in the toolbar, or choose Tools > Markup (⇧⌘M), to show the markup tools.
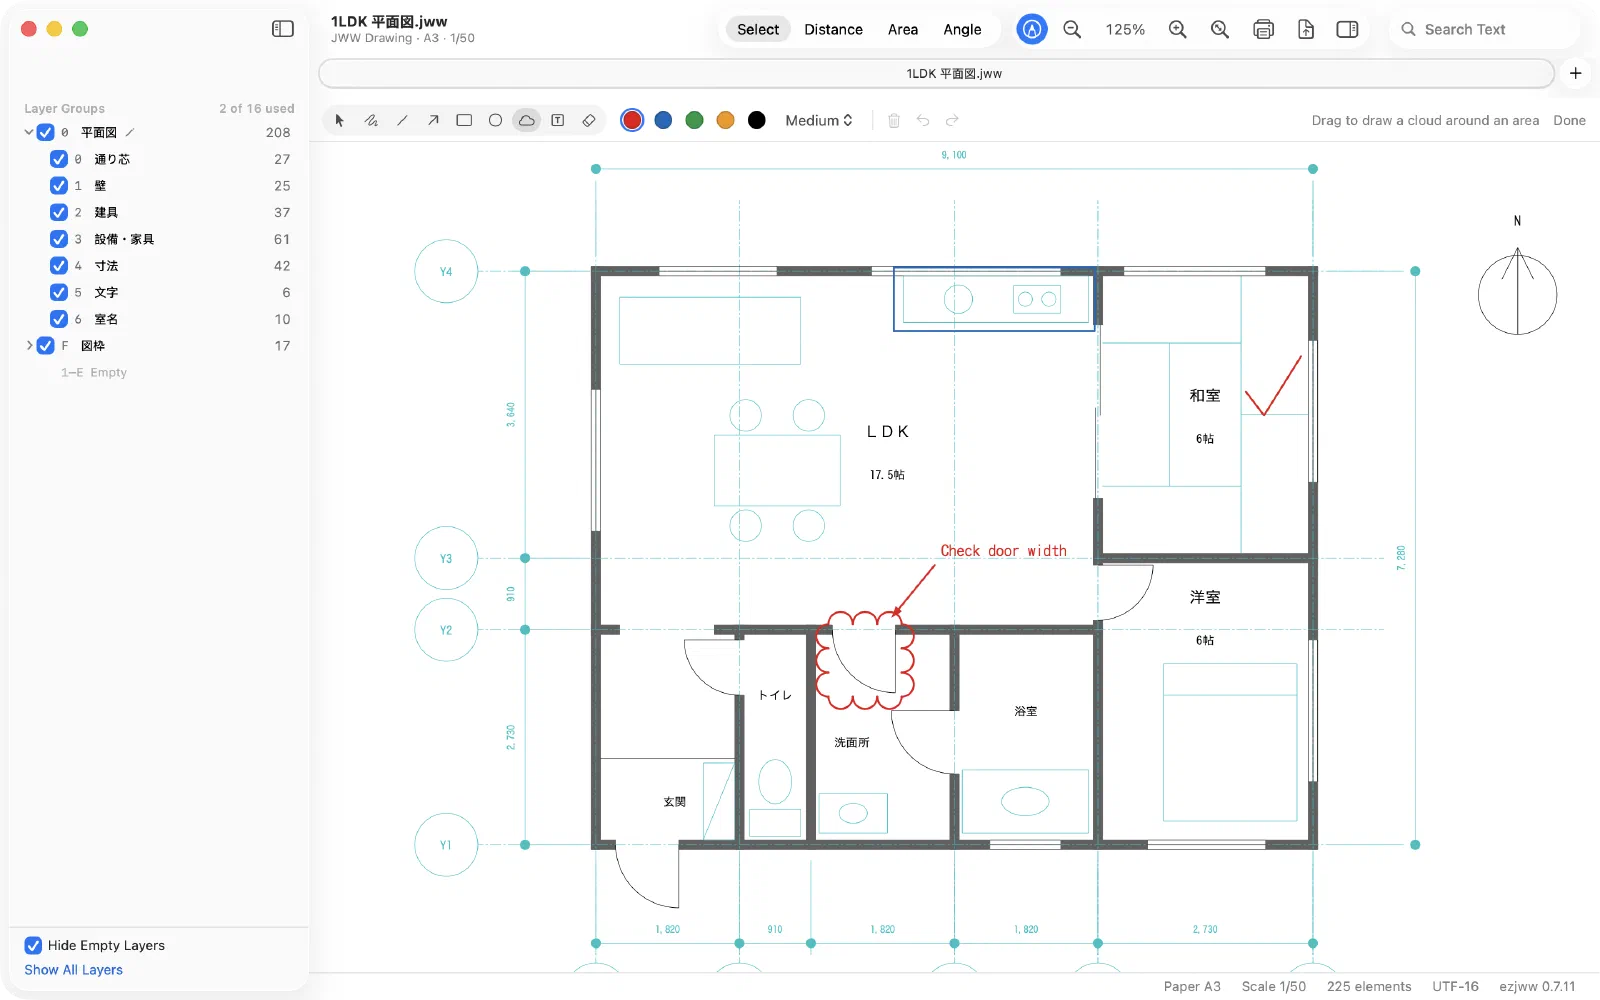
Tools
Select, Freehand, Line, Arrow, Rectangle, Circle, Cloud, Text and Eraser. You can also choose a color (red, blue, green, orange or black) and the line width.
- Select: click to select, drag to move, press Delete to remove. Double-click text to edit it.
- Cloud: drag around the area you want to mark.
- Text: click where the text starts and type.
- Eraser: click markup, or drag over it, to erase it.
- Undo with ⌘Z and redo with ⇧⌘Z.
- Click Done when you’ve finished.
Saving and exporting
- Markup is saved inside JWW Bridge for each drawing. The original JWW file is never changed.
- When you export PDF, DXF or an image with Include markup turned on, the markup goes too. In PDF it is on its own layer that PDF viewers can show or hide. In DXF it goes on a layer named “朱書き”.
- Turn View > Show Markup on or off to show or hide it on screen.
Share only the markup
Choose Tools > Export Markup… to save a file that contains only the markup. The other person opens the same drawing and chooses Tools > Import Markup…; the markup is added to what’s already there, and can be undone.
If you don’t purchase after the free trial ends, you can still see markup, but not add or edit it.
Last updated: 2026-11-10 · Still stuck? Visit the support page.